How We Did It - Page 1
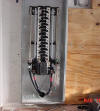
When we decided to go computerized and REALLY begin to up our light count, we had to consider available power. Previous to 2007, we had a sub panel that was simply a 60 amp feed off of the main panel. From that sub panel we would simply run circuits into the yard using standard household 10 or 12 AWG wire. We would attach outlet boxes to 18" long 1" diameter schedule 40 PVC and had anywhere from 4-6 outlet boxes on one circuit. The sub panel allowed for 10 circuits, BUT we had to be careful on what other circuits we used. Because it was simply a "sub" panel off the main feed for the house, we could not run large appliances while the lights were on.
Keep in mind that previous to 2007, our display was static and everything was on for about 4-6 hours every night. Normally you should not allow the draw of your house to exceed 80% of your available power for any long period of time. With all the lights on we were at about 84% to 86% which was really pushing the envelope. That little 200 amp meter was really spinning.
So the first thing we did was call the power company to see what we could do as far as upgrading our service. They told us that the maximum allowable service to a residence was 400 amps (standard is 200 amp). The only condition was that they would NOT run this overhead, it would have to be run underground. Therefore, STEP 1 was to install 2" electrical conduit from the pole to the meter location. Once this passed inspection we moved on to the next step.
STEP 2 was installing a new meter box. You have to have a meter and meter box that is rated for the level of service that you have.


